


There are many ways of connecting small electric motors to Arduino platforms. The easiest and most popular methods are connecting it via an H bridge or transistors. When connecting electric motors to an Arduino platform, you must remember not to connect them directly, because that could damage the programming platform.
Why should you connect electric motors to Arduino platforms?
Implementing electric motors into modules and controlling them via Arduino opens up numerous possibilities. The main purpose of connecting motors is to move module components, build vehicles, and even create robots. Arduino lets you control both the motor shaft rotation direction and its rotational speed.
Motors must be connected to Arduino indirectly
Connecting a programming platform directly to a motor not only creates a risk of interference that may damage the Arduino platform’s external port or the entire board, but also reduces your control capabilities of that module to a minimum. Arduino platforms can supply current of approx. 20mA via all their external ports, while all electric motors – even the smallest ones available on the market – require currents from ten times to one thousand times stronger than that in order to function properly. That’s why it is vital to connect each electric motor to an Arduino platform indirectly, via an appropriate driver that will regulate the current transferred to that motor.
Which motors can be connected to Arduino platform? What to look for when choosing them?
Arduino programming platform is compatible with all low power electric motors available on the market. You can connect the following motors to Arduino platforms:
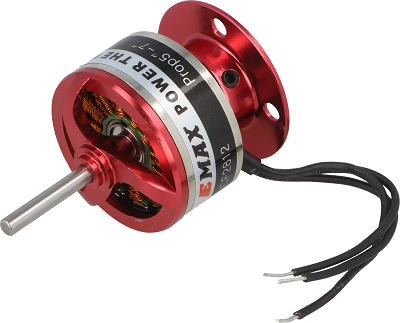
- brushless DC electric motors with commutators;
- brushed DC motors, the simplest DC electric motors;
- vibration motors that generate vibrations with shaft movement;
- stepper motors that ensure highly precise control with shaft pulses;
- EDF drives, combining fans and motors in a single housing;
- linear actuators that enable linear movement;
- servo motors,
- small vacuum and water pumps.
The parameters you should pay attention to when choosing an electric motor for your Arduino platform depend on the type of a particular actuating module. Among the most important ones are:
- supply current [A] – the current required to properly power the engine;
- rated voltage [V] – this is the voltage that your module will use to operate (Arduino modules typically use 12V);
- torque [Nm] – a key parameter of every electric motor (and other motors) that determines its power: higher torque means more power;
- rotational speed – [rpm] – determines the speed of shaft rotations;
- mass and size [g and mm] – these parameters are especially important for lightweight modules: you must consider motor size when building them;
- resolution [number of steps] – applies only to stepper motors and determines the precision of shaft movement;
- line speed [mm/s] – applies only to linear actuators and determines the speed at which the motor can extend its shaft in a linear motion.
How to connect an electric motor to an Arduino platform?
Once you are familiar with the types of motors that can be connected to an Arduino platform and you know which parameters are important when choosing them, you can proceed to connecting a motor. Standard brushed DC motors, vibration motors, and servo motors are the easiest to connect. Connecting linear actuators, stepper motors, and pumps is slightly more difficult.
Connecting via a transistor
Brushed DC motors and vibration motors are the simplest, most common, and easiest to connect. Typically, you should connect 1A–5A motors that operate with a voltage of 5V–9V to the programming platform. More powerful motors require special drivers.
Brushed DC motors and vibration motors can be connected via transistor or H bridge. The first connection method only lets you control the shaft rotational speed, while the bridge method lets you control both the rotational speed and direction. Choose the connection method best suited to your needs.
Connecting a brushed DC motor and a vibration motor via a transistor
Connecting a brushed DC motor and a vibration motor via a transistor is very simple and requires only three components: a current limiting resistor, a rectifying diode, and a transistor. You can use e.g. a 1N4148 or 1N4007 rectifier diode, a 2N2222 transistor, and a 10kΩ current limiting resistor in your module.
Begin the installation by choosing the Arduino pin with the right output voltage. Connect that Arduino pin to a resistor via a breadboard, and then – at the very end – connect it to the transistor base. Ground the transistor’s emitter and connect its collector to the motor via a parallel rectifier diode. Connect the motor to power supply on the other side.
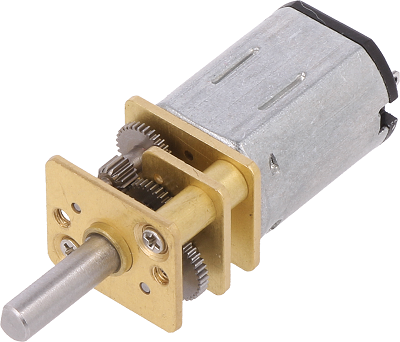
The resistor limits the current supplied to the transistor, while the rectifier diode lowers the risk of back-EMF and voltage peaks that may occur when switching the module on. Back-EMF and voltage peaks could damage the programming platform.
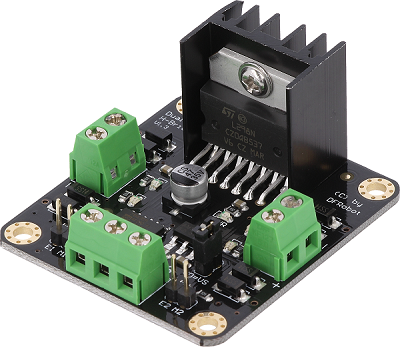
Connecting via an H bridge
This connection method lets you control both the rotational speed and direction of your motor’s shaft. While it is usually unnecessary to control the shaft rotational direction of vibration motors (since they generate vibrations regardless of that direction), the ability to fully control the shaft of a brushed DC motor is often a key function in any module. What’s more, you can also use an H bridge to connect a linear actuator, as long as its design is based on a DC motor.
You can make H bridges yourself – by combining several transistors – or simply purchase them. Their main purpose is receiving the signal sent by Arduino and transforming its parameters at the bridge’s output.
If you want to connect a brushed DC motor, a vibration motor, or a linear motor, you will need the following components: a limiting resistor (e.g. 10kΩ), a switch, and an H bridge circuit (e.g. SN754410, L29NE, or L293D).
You should pick an H bridge that is compatible with the current rating of your module’s motor at maximum load – this parameter is known as “current capacity” of a bridge. Each H bridge can have a slightly different structure and pin layout. Therefore, before you begin installation, you should check your bridge’s pin layout diagram in its data sheet. We will use the L293D bridge as an example of connecting an electric motor to an Arduino platform.
The L293D bridge has the following pins:
- pin 1 – for controlling the motor speed;
- pins 2 and 7 – for controlling the motor shaft rotational direction;
- pin 8 – VC power supply (up to 36V);
- pin 9 – for controlling the second motor’s speed;
- pins 10 and 15 – for controlling the second motor’s shaft rotational direction;
- pin 16 – VCC power supply (up to 5V);
- pins: 4, 5, 12, 13 – grounded (connected to GND).
First, place the H bridge on the breadboard. Next, connect the bridge’s ground to a power supply. Then, power the engine(s) on. Following that, power on the logic that controls the bridge. Finally, connect the pins that control the operation of engine(s).
Before you start connecting all components, keep in mind that an H bridge and electric motor circuit can be powered with one or two voltages. If you choose to power it with one voltage, you will have to use a power source with a good voltage filter that will sufficiently lower the risk of interference. A better, more popular, and safer solution is powering your module with two sources – powering the motor via the bridge, and powering the bridge’s logic (that controls the motor) from another independent power source. Therefore, it’s a good idea to connect a 5V Arduino pin to the bridge’s logic, and connect the remaining power sources to bridge pins that control the motor.
Connecting servo motors
Connecting servo motors is really easy since their pin layouts are always the same. When connecting a servo motor to an Arduino platform, start with connecting grounds of your motor circuit and the module (usually two separate 5-volt power systems are used). Next, connect the PWM Arduino output (marked with “~”) to the pin that will control the servo motor. Once you’ve finished connecting all components, you only need to load the right library.
Connecting stepper motors via a dedicated driver
Stepper motors are connected to Arduino indirectly, via dedicated drivers. Those components must be matched in regard to maximum current and rated voltage, and the driver itself must be matched to the supply voltage of the motor and the entire module. Driver’s current capacity must be larger than the maximum current consumed by the motor.
For the purposes of this article, let’s say we want to connect a 12V stepper motor to an Arduino platform. It is compatible with e.g. the A4988 RepRap driver. First, place the driver on a breadboard, and then connect the GND and VDD pins to the driver’s power source (3V – 5.5V). Next, connect the GMD and VMOT pins to the motor’s power source, and connect the SLP pin to the RST pin. Connect pins: 1A, 2A, 1B, and 2B to the motor. The connection method of 1A, 2A, 1B, and 2B pins depends on the stepper motor’s type (bipolar/unipolar). For bipolar motors, connect the 1A pin to the motor’s black cable, 2A pin to the red cable, 1B pin to the green cable, and finally 2B pin to the blue cable. Unipolar motors have six cables, but we don’t have to connect the yellow and white cables.
Connecting a stepper motor to an Arduino platform correctly makes that motor’s shaft rotate right in a high state and left in a low state. For rising edge, the shaft moves only one step, and its direction depends on the connection of the DIR pin.


")


