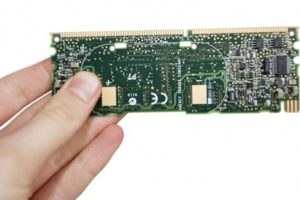
Printed circuit boards (PCBs) are vital components of most electronic devices and equipment these days. Designing your own may be a good idea to pursue especially if you want to create something that is customized to fit your needs. There are many times that you may have specific requirements for the PCB and getting the pre-created boards may not be suitable for you. It is in situations like these where DIY is quite understandable.
While these are people who might think that it is just unnecessary stress to attempt to create and then design their own PCB there are a lot of advantages to making your own. Since you have the freedom to customize the board to the specific specifications of the project you have in mind, you have the choice to make it as big or as small or as simple or complicated as you want it to be. When you build your own PCB, you get a lot of opportunities for creating on that is more cost-effective without discounting its overall practicality and function.
If you wish to create your own PCB, however, there are conditions that need to be met. This is essential so you know that the one you end up with will be in the exact specifications of how you intend to use it for. Here are important components that must be fulfilled for DIY PCB.
Pay attention to system schematics
Before you start designing your PCB, make sure to look into its system schematics first. You need to know what type of circuit you want so you can build it exactly how you need it to. This will also make it easier for you to determine what the circuit system requirements are going to be.
After designing the project’s schematics, use it as the foundation of your electrical structure. Whether it is simple or complicated, when a system schematic has been put in place, the rest can follow. It is easier to get the rest of the work done when you have a solid foundation, to begin with. You can always check out tutorials and other hacks online when it comes to building a system schematics from scratch.
Appropriate design software
It can be a little too complicated to have to design your PCB manually or from scratch. These days, PCB design doesn’t have to be overwhelming or overly complicated, thanks to the presence of design software. The right one will help reduce the complications of DIY PCB design. Choose a brand that will allow you to use it at will and one that will not require you to have to pay for a continuing license. This will ensure that your designs will be saved in a trusted and secure place. While this would mean shelling out a bit of money to buy the software, it is usually a worthy investment, you will get to do DIY PCB designs quicker which is ideal if you have tight deadlines to follow. At the same time, this also reduces the chances of errors and other problems in the programming.
Reusable breadboards
When attempting your first DIY PCB design, it is best to go for solderless breadboards. They are reusable which means that it is easy for you to get some experiment done on how you would like things to be laid out on the board before finally making a decision. There will be no need for soldering too which means that you won’t need to have extra skills when doing the design nor will you have to deal with unnecessary complications.
Boards of this kind tend to be easy to buy too. More importantly, they are cheaper compared to some of the more complex and durable types. It is made of laminate material, making it easier to handle so ideal for those who are still getting into and finding their way through DIY PCBs.
Natural creativity
If you are to start designing your own board, you’ll need more than just basic knowledge of how it works. You’ll need the necessary creativity to think outside of the box. You’ll need an experimental attitude to not be afraid to try out something new and do something different. With the right software to play with, it will be easier to inject this creativity into actual results, especially if they are designed to allow users to tinker around them with the aim of coming up with not only professional PCBs but creative ones too.
Right number of parts
If your goal is to make a DIY PCB that is going to cost less, the number of parts you will be using can have an impact on that. Reducing the number of parts is one way of reducing the manufacturing cost in the process, if your goal is to have your design mass-produced later on. This is because, with less parts involved, the processing time will be significantly decreased as well. Testing will also take a much shorter span of time.
Standard and easy to find components
You will want to design a PCB that will have components that are easy to find and replace. Standard components are like that. They are easily sourced and when you buy them from almost everywhere, you’ll find that they are easily in stock. In addition, not only are standard components easier to find, they are cheaper too. At ELE PCB Assembly, you can get the right high-quality components for all your needs and great affordability. As much as you can, steer clear from custom-made components as they can usually cost an arm and a leg and you’ll likely have issue replacing them if there are problems in the future.
Easy to fabricate
Design a PCB that is easy to fabricate- that is if faster manufacturing and mass production, later on, is what you have in mind. A lot of people often tend to get drawn towards designs that involve strange shapes and cuts. While this is certainly one way of showcasing your creativity, this may cause issues later when fabricating your model. You can always stay creative without making the whole design complicated. Not only will this help you come up with a fabrication-friendly design, but this can lead to lower production costs too. A good combination of good design and appropriate material will help you avoid headaches down the line.
If you want to know more about PCB articles, you can browse this URL:https://www.pcbonline.com/blog


