


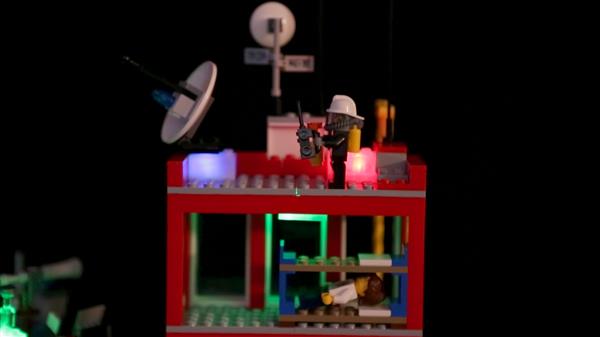
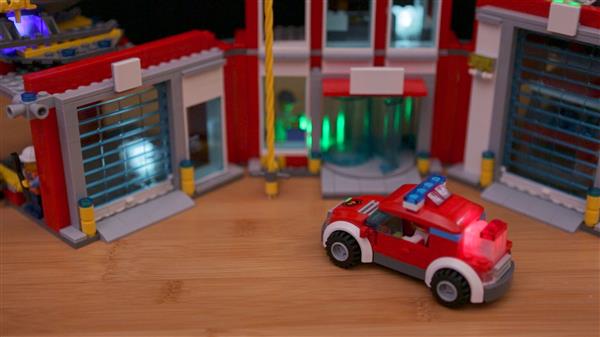
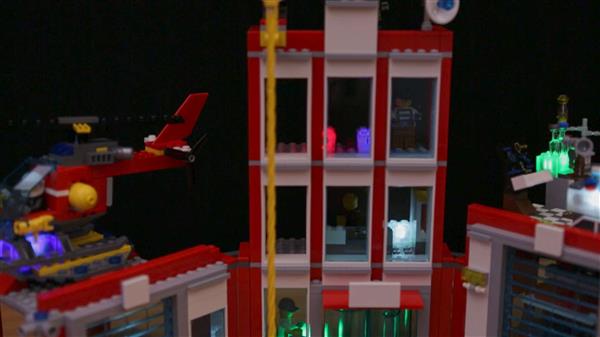
DIY project site Adafruit has just released a new tutorial for 3D printing your own light-up Lego bricks. Made with tiny battery-powered LED lights, the Adafruit project is functional with any Lego-compatible brick, and offers several different colour options. And, no matter how complex your lego brick laying may become, actually using the light-up blocks is a synch: a tiny button on the side turns the embedded LEDs on and off.
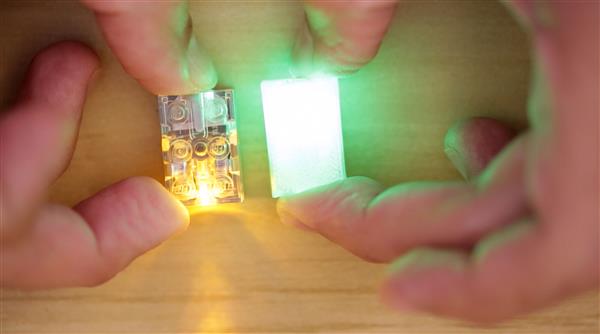
There’s a few key benefits to this DIY 3D printing project. Compared with the officially branded light bricks, which contain a spotlight ideal for pointing light, the Adafruit version contains diffuse lighting, effectively making the entire brick glow. The two versions thus offer noticeably different kinds of lighting but, as they’re the same size, the Lego light bricks and the 3D printed version can fit together to create interesting lighting combinations.
Other advantages include easy use instructions. A tiny push button controls the lights for simple on and off functions. Each light shows a single colour and comes free of digital controls, thus enabling the small size of the gadget. The idea is that a smaller sized light opens up increased possibilities for applying them to other projects as well.

The small size of the bricks also means that the project can work on even the smallest build plates so, in other words, this project should print on all 3D printers. The Adafruit tutorial also notes that this is a quick print job: each brick only takes about 8 minutes from start to finish.
For those in need of a brush up first, Adafruit recommends reading through their tutorials on soldering, multimeters, and LED lights before starting this lego project.
That being said, Adafruit’s list of required parts is fairly manageable. For each brick, users will need to get their hands on some LED sequins, a 6mm push button, two coin cell batteries, a #2-56×3/8 screw, a 6mm slim tactile switch button, some copper tape, and finally, a bit of translucent PLA filament.
The list of necessary tools and supplies is straightforward as well. Adafruit recommends you have on hand a pair of tweezers, wire strippers, diagonal flush snips, and helping third hands.
As for additional technical info, the LED brick was designed in Autodesk Fusion 360 software, and was designed to print in basic PLA filament. The Adafruit version was 3D printed using the BCN3D Sigma and Micro M3D, but is appropriate for any 3D printer, even your most basic desktop printer.
Check out the full tutorial here, including circuit diagrams, assembly instructions, and any extra background info you might need before starting this project. Happy DIYing!
Source: http://www.3ders.org/


